Tips for Sewing without Puckering
Sewing is a talent that requires serious attention and utter dedication. Only with conscious efforts, one can gain true excellence in this field. When you aren’t motivated, you make mistakes that are hard to ignore. One such mistake is fabric puckering. By definition, it is the awkward pulling of the thread that makes the clothing look cheap and low in quality.
Every tailor has faced the struggle of fabric puckering at least once in his career. In the garment industry, this element is a major point of differentiation between home tailors and the professional ones. Even the prettiest dresses are ruined when the fabric bunches up and gathers in a weird line. It can destroy the entire look of an outfit in minutes.
But no problem is impossible to solve. Likewise, there are solutions through which you can ditch this puckering issue too. We have some marvelous ideas that will help you in the process and assist you in achieving a pucker-free stitching experience. The tips for sewing without puckering are as follows:
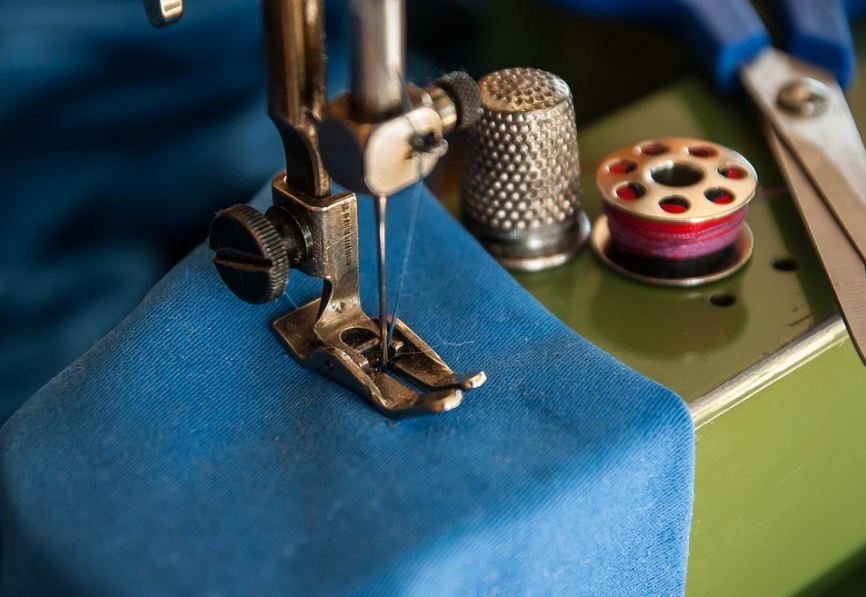
1. Use the Appropriate Needle
A needle is an essential instrument of sewing. Even though it is reusable, it still requires some monitoring. When you use the same needle again and again, it loses its sharpness and becomes dull. This can create tension in the sewing material. It also takes more effort to pass through the fabric, which later produces puckering in the final product.
To avoid this, you should replace your needle every once in a while. As the new one easily passes through without causing any damage, it helps prevent puckering in the long run. It will save you a lot of time and effort as well.
So, if you have a needle that is losing its sharpness, throw it away as soon as you can and get a new one. This will give you a perfect seam every time.
2. Use Zigzag Stitches
Sometimes, straight stitches can make the otherwise perfect piece of clothing useless. As the straight line stitch allows the fabric to stretch and shrink away, the entire look of the seam is ruined as a consequence of it.
To fix this, use small zigzag stitches to stop the fabric from stretching out. It will create a balance in the movement of fibers preventing them from bunching up, which causes puckering in the first place.
3. Do Not Pull Your Fabric
Usually, to get a perfect line, it is suggested that you hold your fabric while sewing. The thumb and index finger make an L shape with the sewing material in between. It is a common practice that has been observed for a long time.
But while this hack is useful, some new tailors make a common mistake of pulling while doing this job. This causes extra tension and stretches the fabric, leading to the gathering in the final seam.
Therefore, it is recommended to leave the tension settings on the machine, and just hold the material without applying any extra force on it. It will take some time to master this art, but the results will be worth it.
4. Choose the Right Thread
Just like different fabrics, there are also many kinds of threads. To get a smooth stitch, you must choose the right thread for each material.
Polyester threads have more stretch, while cotton is quite rigid. Similarly, there is little to no stretch in nylon. When you select the appropriate thread, it gives you a clean stitch with no puckering whatsoever.
5. Adjust the Tension Settings
Tension is important to get balanced and equal stitches. If you are a novice, ask someone to set tension for you. Otherwise, reboot the dial and start again. Try with the lowest setting and work your way up until you get the desired results.
Before you work on the final piece, it is suggested that to set the tension on a rough fabric. This will help you gauge the results without destroying the actual product.
6. Trial and Error Approach
When you’re new to the stitching world, you might find great difficulty in learning different modes of the machine. It may seem easy, but it is tricky to understand the intricate concepts of sewing in a short time.
Therefore, take your time and practice to learn this art. If you fail to understand the reason behind puckering in your pieces, try changing the modes of the machine, and keep adjusting until you get a satisfying outcome.
It will require concentration to make sense of this technique. But once you resolve this issue, you will be all set to produce good quality pieces.
7. Do Proper Pinning
When you sew, you need a guideline for the correct curve or design. For this, pins are attached as a rough outline to hold the pieces together, and to help the tailor in determining where he should sew. Sometimes, when the fabric is not pinned properly, the stitches pucker. The tailor keeps checking his technique to find the problem while the real fault resides in the pinning.
This step is as important as sewing. Therefore, if you cannot determine the cause of puckering in your pieces, look over the pinning process and make sure that you haven’t made any mistake there.
8. Be Careful About the Machine’s Speed
Sometimes, tailors often speed up the machines just to get the job done. But they forget that sewing speed is also a detrimental factor of puckering in the resultant article.
The more the speed is, the faster the material is pulled through the machine. And when the fabric is pulled fast, it increases the tension. This tension, in turn, causes the fabric to pucker.
Thus, to avoid puckering, take your time, and use the machine at a moderate speed. This will not only give you your desired finish, but it will also help you avoid any accidents.
9. Practice on Rough Patches
If you are new in the field and do not want to ruin your product due to lack of confidence, practice your work on rough patches. This will give you an idea of where you stand in this skillset. Also, it will make you understand different aspects of sewing that are harder to absorb through theory.
Always keep some rough patches on hand and practice to sew. You see, it is better to do your homework rather than working professionally with a lack of practice. This little activity will boost your confidence and help you master this art.
Conclusion
Stitching is not everyone’s cup of tea. It is a craft that only a few can master. Little details of complex nature make this art unique. These details also determine the skill level of the tailor. One mistake and the entire piece is destroyed. An example of such mistakes is fabric puckering.
When the tailor doesn’t give attention to puckering, the eye would only go to that flaw no matter how good the overall design is. To avoid this problem, take help from the tips mentioned above to improve your sewing technique.
Keep in mind that it takes a long process to become a perfect tailor. And, only your hard work can help you achieve that goal. Therefore, you should keep practicing until you reach your desired satisfaction level.


